Saturday, October 2, 2010

Laminate and Hot Coat


Progress continues at a glacial pace. Today, I managed to glass and hot coat the top of the board. No doubt, this was the one step in the construction process that I was a little anxious about doing. The process of glassing and applying the hot coat seems as though there is very little room for error and plenty of opportunity to create more work or worse. I used some denatured alcohol to clean the deck of the board. Then I made a blue tape skirt around the bottom of the board. Next, I laid and cut the fiberglass to fit the deck with an inch or two of excess glass hanging below the rails. I bought a 3M respirator because the authors of the manual scared me into it with their ominous health warning. I'm sure it was money well spent and no doubt I'll be using it whenever I sand again. Anyway, I carefully read the directions (twice), mixed the epoxy as instructed and then began pouring and squeegeeing epoxy around the deck. It seemed far too easy, which makes me think I may have done something incorrectly or neglected a critical step. I waited a few hours and then applied the hot coat, which is essentially the same thing as the previous step. The board looks pretty glossy and the grain is quite pronounced (as are the many errors I made along the way).
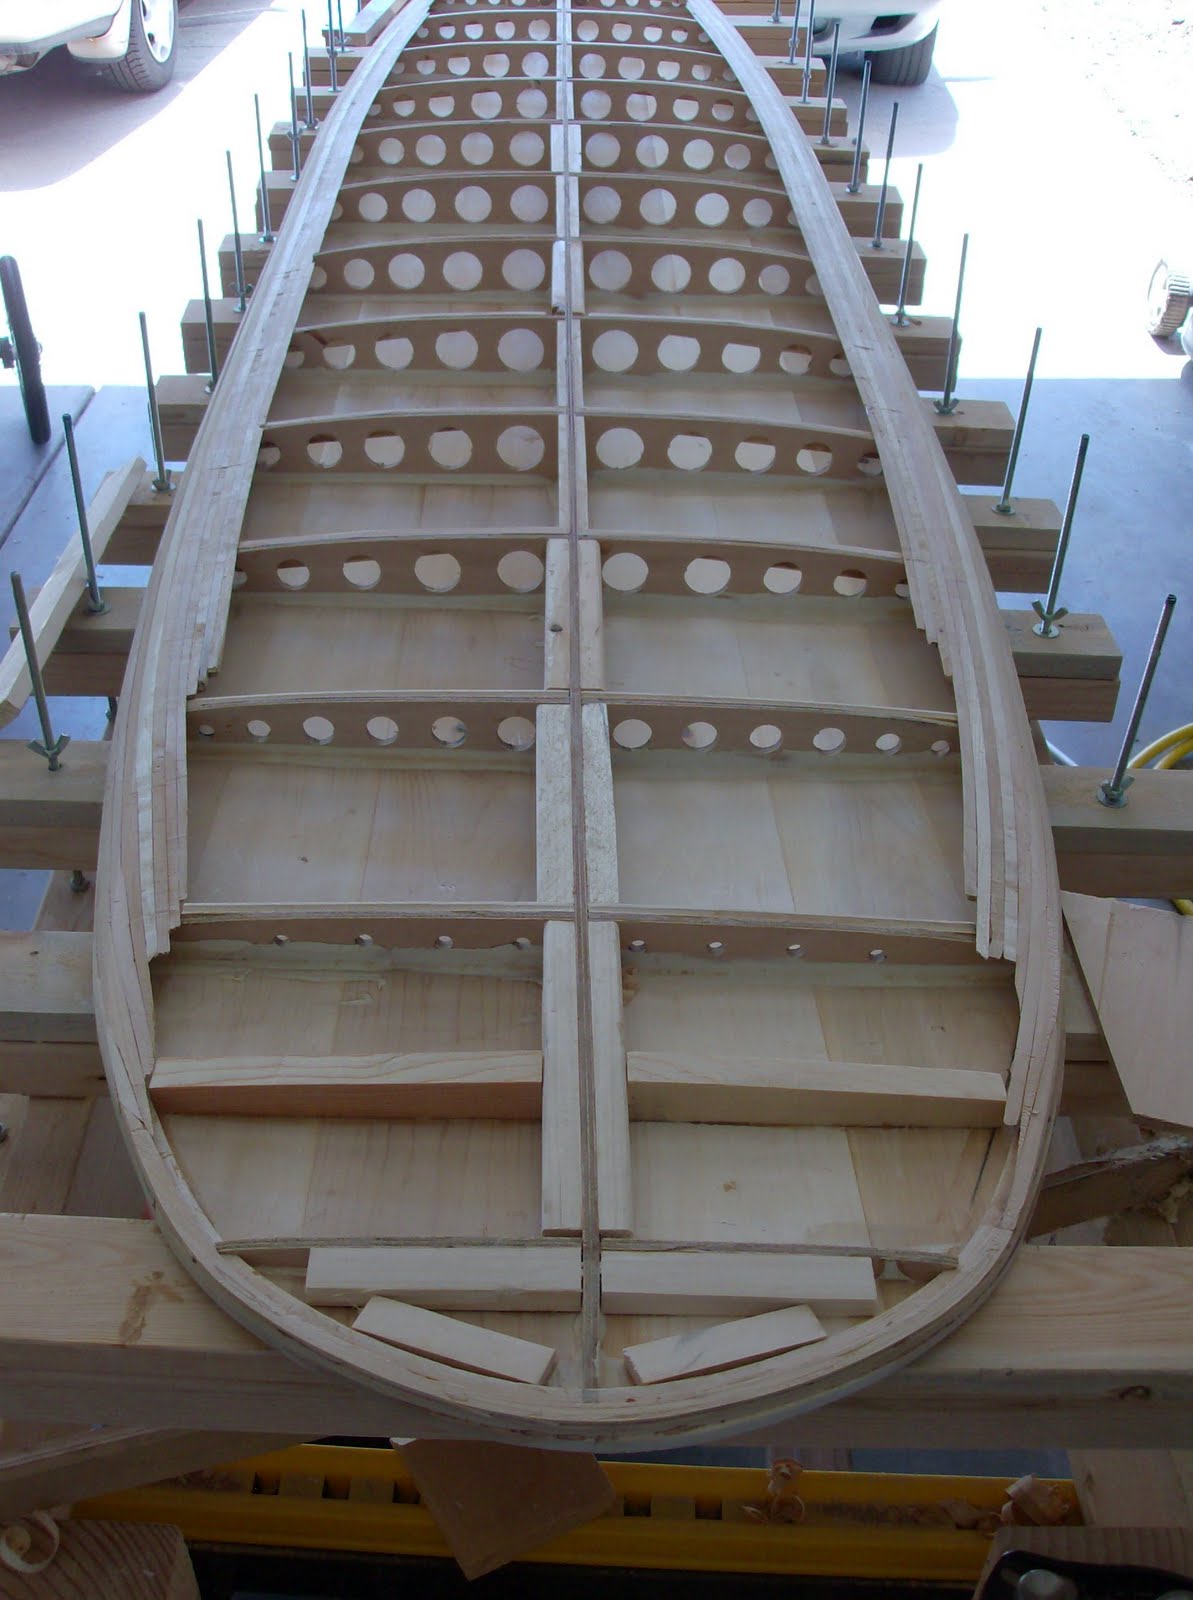
PS In the image of the blue tape skirt, you can see that I have another board in the works. I ordered a Sapling kit and last week I adhered the keel and frames to the bottom planks. The bottom of this board has some contours, so I modified the slats on the rocker table to add pressure where the contours are located.

Sunday, August 29, 2010

Noseblock Adhered and Shaped


Well, I emailed Mike at Grain, regarding my situation with the nose of the board, and he provided me with some excellent advice. He suggested that a noseblock would be best in this situation because it would add strength and imporve the aesthetics. I took Mike's advice and cut the nose off the board. As I was cutting the tip of the nose off, I felt as though I might be making a mistake, due to my limited woodworking abilities.

I glued up some redwood and poplar (I didn't have enough walnut and cedar to match the tail block exactly) on to the nose. I wasn't sure that I could make the two pieces of nose block match and get the correct angle when gluing them to the board, so I left a little triangular area open. I glued in a pine scrap to complete the nose block. It ain't pretty, but it's rock solid and solves the initial problem.


Monday, July 5, 2010

Rhinoplasty...?


I was fine sanding the board in preparation for glassing and I noticed that part of the nose is dangerously thin. It's so thin in fact, that I can see the Titebond and part of the starter strip. I'm at a crossroads here, trying to decide whether I should just leave it as is and just glass it or remove the thinned area and replace it with a nose block. The tape in the images is the outline of where I would cut the nose to add a nose block. I'm leaning toward leaving the thinned area and glassing it, but I'm concerned that it will affect the structural integrity and possibly be prone to leaking. I've emailed Mike at Grain seeking advice and will wait until I hear back from him before proceeding.

Sunday, July 4, 2010

Tail Block, Rail Shaping and Sanding


Once again, it's been a while since I last posted an update. Since the last post, I completed the shaping stands, attached the tail block, shaped the rails and began sanding in preparation for glassing.

Attaching the tail block required a few attempts. First, I made a clean, straight cut across the tail section. Then I made a small, three layer tail block, consisting of walnut and cedar. Initially I tried to use some of the many clamps I have accumulated with this project. None seemed to work very well. I decided to try using blue tape instead of clamps and it worked great, much better than I initially thought. After 24 hours under tape, I was able to shape the tail block and there was never any indication that the tail block was not absolutely adhered to the board.

Shaping the rails seemed easier than I thought, which may indicate that I did it incorrectly. I used a block plane and sanding block. I moved slowly and tried not to take off too much wood during the process. The only place where I had trouble was the nose, where I sanded too much and exposed a small amount of Titebond III.

In retrospect, I should have worked more gingerly while I was adhering the bead and cove strips for the rails. There are some small gaps and areas where Titebond is exposed. I hesitate to sand off all the Titebond because the rails already seem thin. I also fear that it would change the symmetry (what little there is) of the rails.

I sanded the deck and bottom as well as the rails with 80 grit sandpaper. I just started sanding with 150 grit to remove the small scratch marks left by the 80 grit. There are a few areas where there deeper impressions in the wood from the block plane pulling the wood that I fear the sanding won't remedy.

I see quite a few small (and not so small) imperfections in my work, but I suppose that's part of the learning process. In the background of some of the images, a Sapling can be seen on the rocker table.

Monday, May 31, 2010

Shaping Stands


With the deck glued on, I started building my shaping stands. This is a fun little side project. A word of caution about the Grain manual and the directions provided for them, there is scant little information other than the obvious - you will need wood, make sure the stands are stable and sturdy, and pad them. I guess the construction of these helpful little devices doesn't need a lot of explanation and it leaves room for creativity. I made the stands this afternoon and now I need to cement them in five gallon buckets and add the padding.

I had to order a spoke shave the other day. Why would I have to order one? There are two Home Depots, one Ace Hardware, and three specialty tool shops in town and none of them had a spoke shave. Most of them didn't even know what a spoke shave was. I'm waiting on that tool and then I can begin shaping the rails.

Adhering the Deck


I glued the deck on the other day. I made at least one small error that I detected a little too late. I didn't quite have the center line of the deck matched up with the keel. It's off about a 1/2 inch near the tail but eventually gets corrected by the the nose. I can definitely see the misalignment, especially with the book-matched knots on the deck that are located near the rail. The knots on one side will be closer to the rail than the other side. Fortunately, the wax on the deck will obscure it a little and I won't have to think about it every time I see it.

I was a little anxious about gluing the deck, for fear that it might crack. I live in the high desert and there is almost no humidity. The deck had been sitting out for over a year and I'm sure it was extremely dry and perhaps even brittle. I thought of an idea to reconstitute the moisture in the deck. I brought the board into one of the bathrooms, along with a pot of water and a camp stove. I boiled the water and created a steam room, letting the board sit in there for about four hours. I took the deck out of the makeshift steam room and glued it on. Other than the aforementioned mishap, the deck looks great and cracked ever so slightly in only one location. An easy fix with Titebond and saw dust.

Everyone talks about the number of clamps required for this project, and they always sound like they are exaggerating. They're not. I used 80 clamps when gluing on the deck! Sixty three inch clamps, 20 two inch clamps and 15 slats on the rocker table. I could have probably used more clamps.

Progress at last


It's been a little while since I posted any new developments. Namely because there haven't been any new developments, at least with the building of the board. That's not entirely true and I'll share a couple of small updates in a moment.

This spring we had a baby boy on March 15. His name is Charlie. At his eight week check-up, his pediatrician heard an unusual sound in his heart. We went to see a pediatric cardiologist later that day and we discovered that Charlie has several heart defects - an enlarged heart (left ventrical), stenosis of the aorta, and a small hole. We were life flighted down to St. Joseph's Hospital in Phoenix later that evening, and two days later, Charlie had coarctation surgery to correct the narrowing (stenosis) of his aorta. The other issues with his heart seem to be related to the stenosis of his aorta, and we're crossing our fingers that they will correct themselves.

That experience kind of put my life in perspective.

Even with all the excitement, I managed to some minor progress with the board. I planed the tops of the bead and cove strips to create a flat landing surface for the deck. I'm not sure I did a very good job of it, but the strips were getting paper thin and I didn't want to risk planing them any further. I was concerned that there wasn't going to be enough surface area for adhering the deck. I attempted to amend this situation by gluing small pieces of wood along the ribs to create more internal surface area along the ribs and keel. I'm sure it increased the weight of the board, but that's okay if it keeps the deck secure. I also added blocking for the fin. I'm still not sure if I'm going to use the fin box included with the kit or just glass on a D fin.

That's all for now.